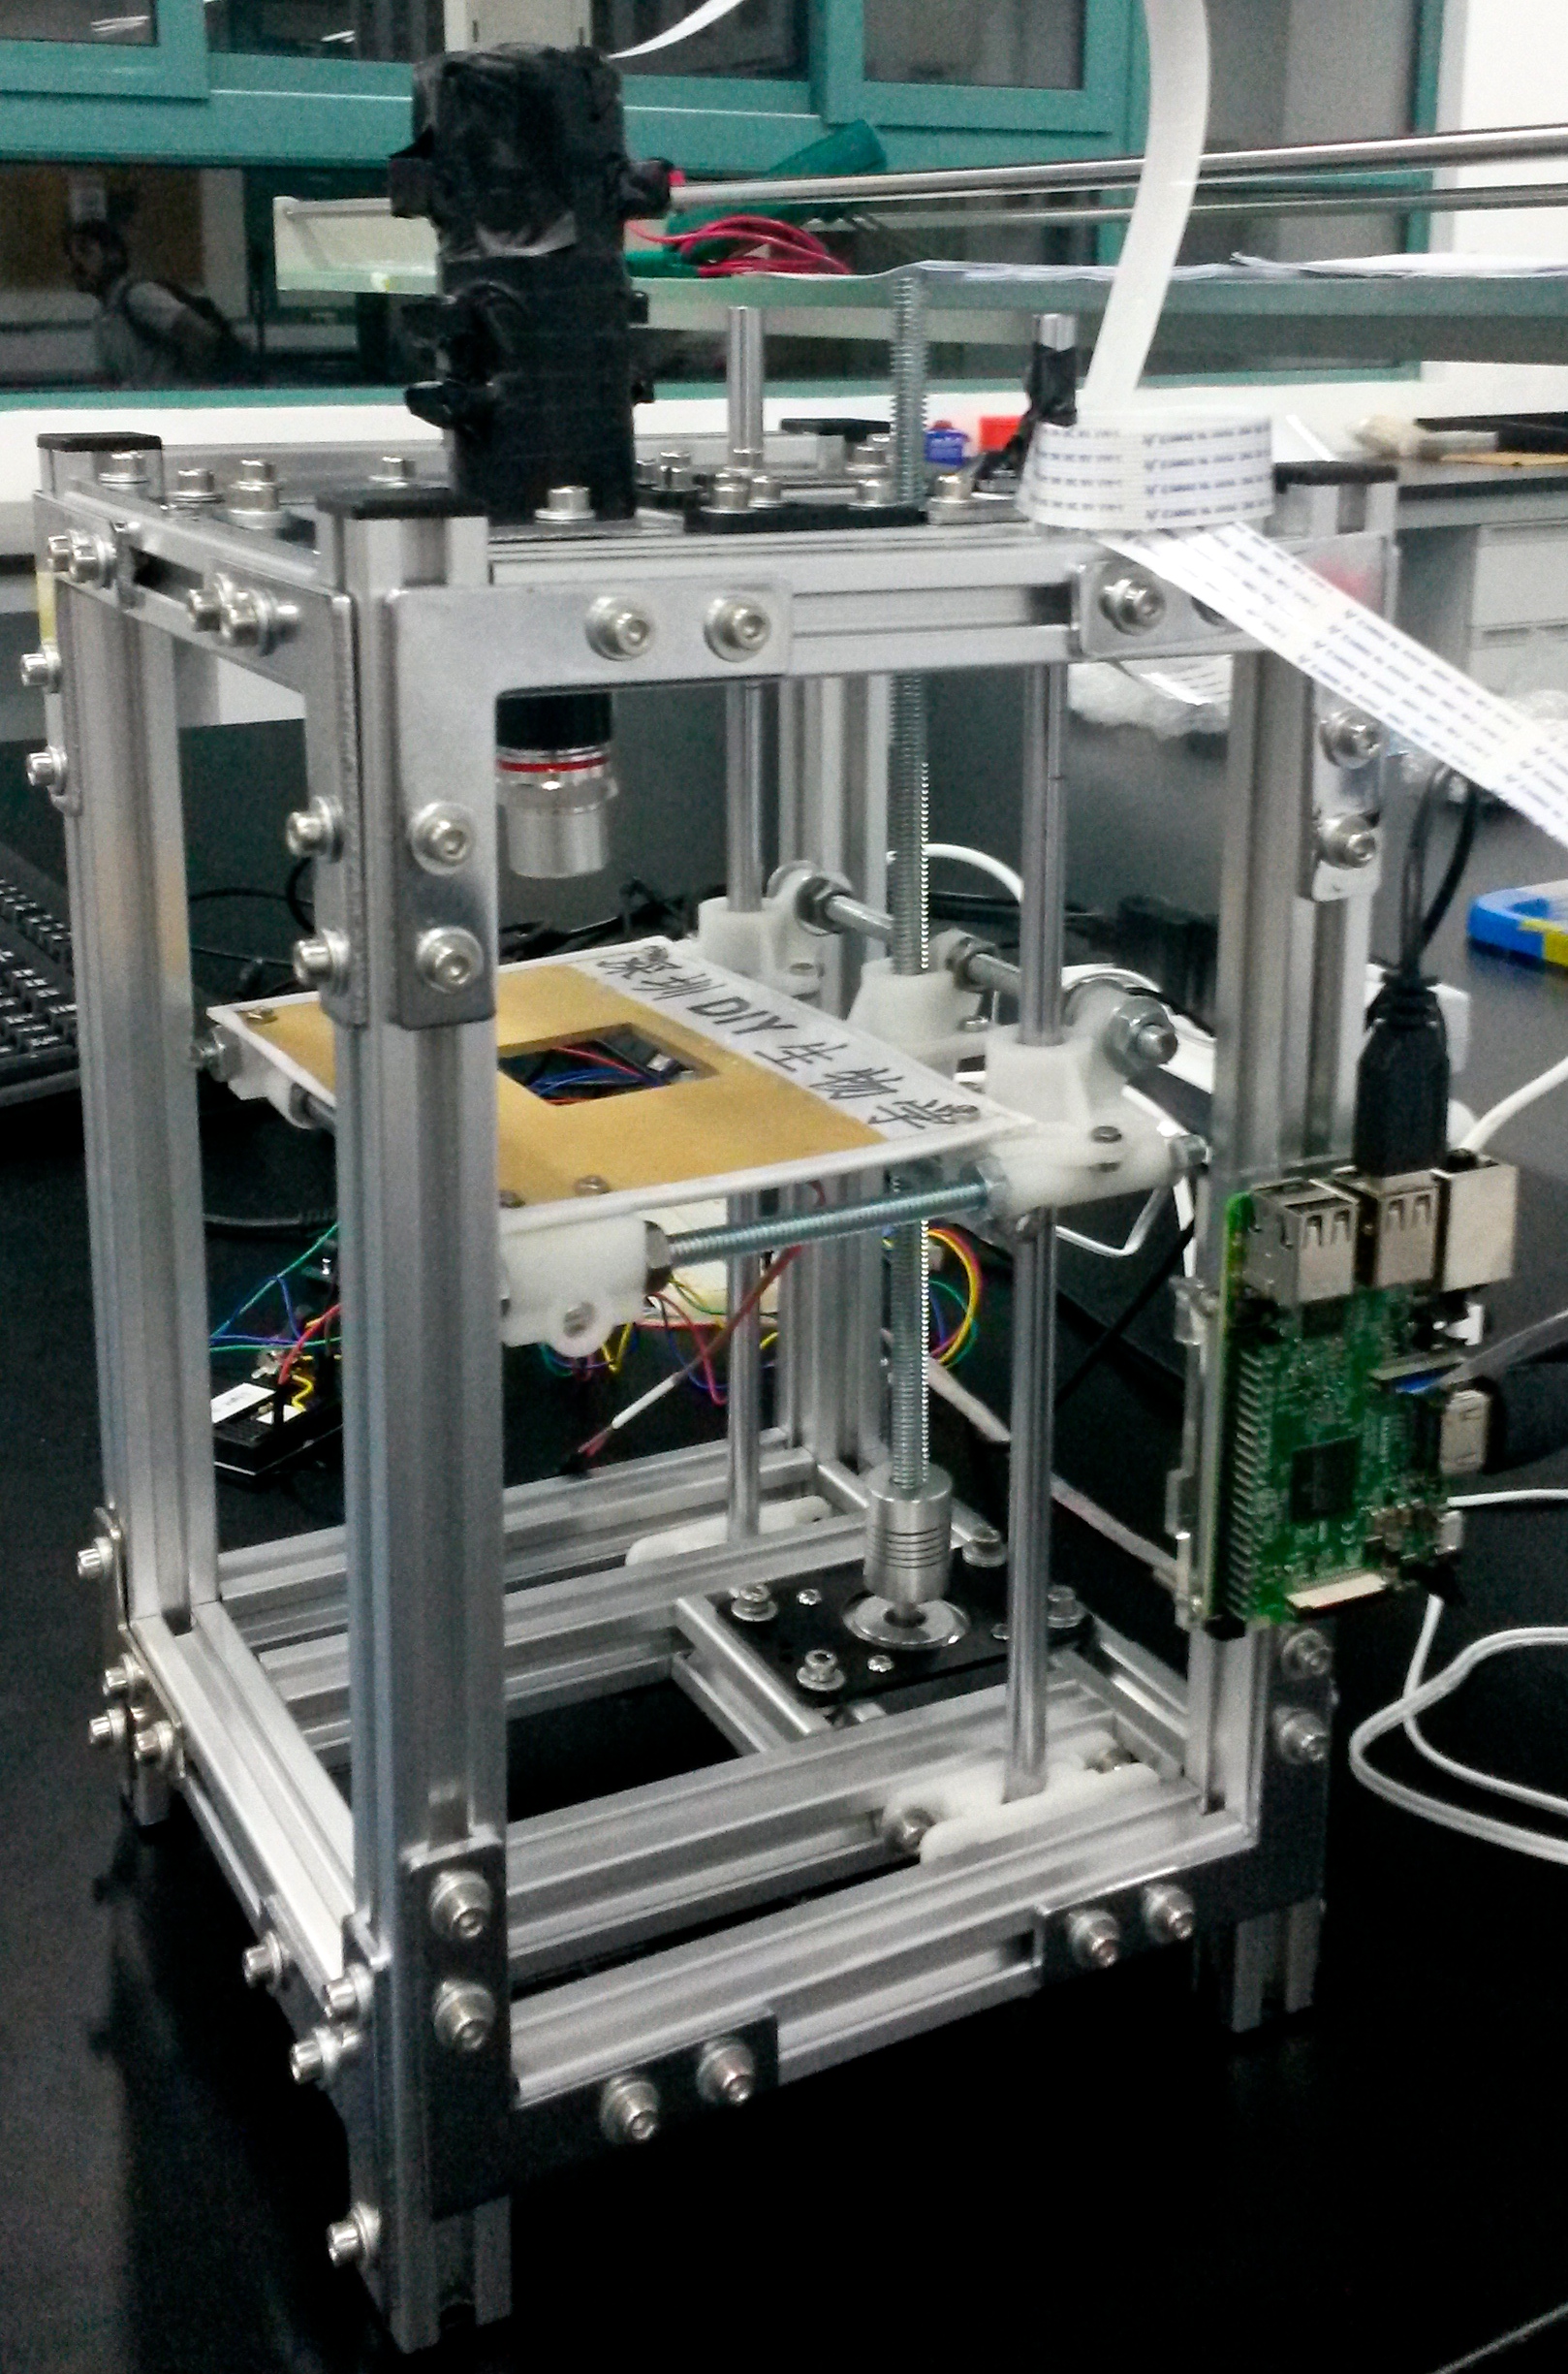
OpenFIESTA microscope V1
The OpenFIESTA 显微镜 initiative was born as a project while hacking a microscope with students of OpenFiesta in Shenzhen during the Summer of 2017 while brainstorming about SDGs. In the context of the quality education (四号) and industry innovation and infrastructure (九号) goals we aim ultimately at producing a fully robotic microscope. Here we developed version 1.0 geared at the supply ecosystem in Shenzhen.
We started by considering the Cambridge [OpenLabsTools] microscope project as starting point. The tutorial which OpenFIESTA students translated to Mandarin [以前的说明] was of invaluable help. Due to the easy availability of V-slot beams in Taobao, we mutated the original work from OpenBeams into V-slot ones. Here you can find the new [step-by-step guide | 逐步指南] and [installation manual | 安装手册] explaining “everything” we did while to construct the first version of the microscope. We hope we will soon see new evolved versions.
Microscope Frame
Used four 300mm long beams to set the hight of the frame. The width and depth of the frame are set by two base squares that were built with 12 150mm long beams and 2 small 60mm beams. The 3D printing files of brackets and bearings needed to build the Linear Translation Stage with rods are available here.
Video capture and Optical construction
To set up the image capture device using some optics hacks and a Rasberry Pi camera. We need 3D print some parts. The files for these optical tubing parts are needed to align the (i) Raspberry Pi camera board, (ii) objective (we try 4x and 10x objectives) and (iii) a biconvex focal lens focusing the image from the objective into the focal plane of the Pi camera sensor.
For illumination we used a single white LED connected with via potenciometer and a resistor (1K Ohm) to the 5V and GND pins of the Arduino board.
Stage translation and Step motor control
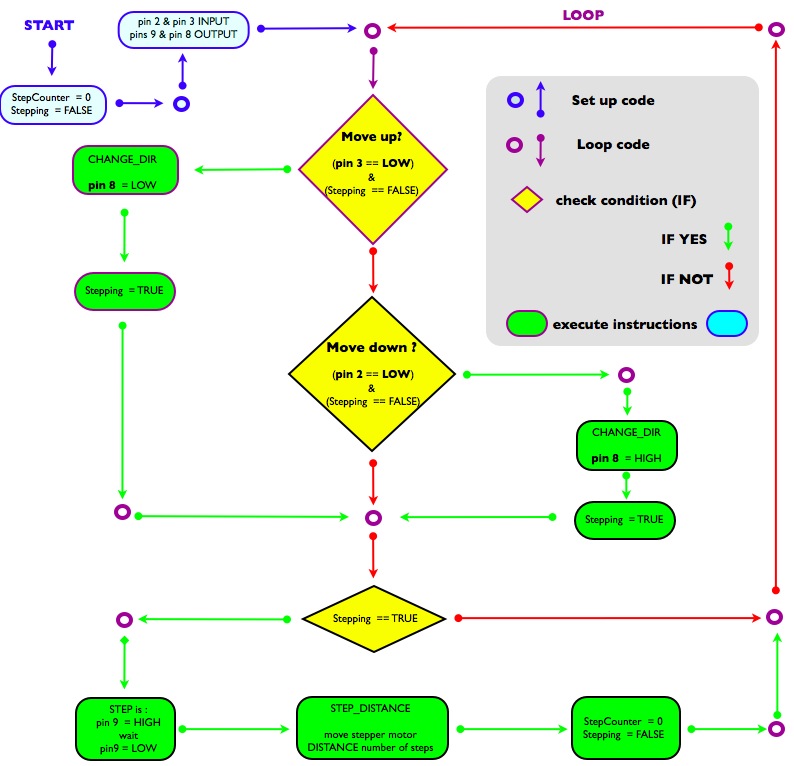
Arduino code [step_driver_2_bottons_1step.ino] is needed to control the stepper motor using the Easy driver. The code is explained in the Motor Control section of the [step-by-step guide | 逐步指南] and implements the logical algorithm to interact with the microscope user via two push buttons for moving the stage up and down. The frame structure translates the CW or CCW motor steps into discrete movements down and up the microscope Z-axis. The *.ino file is a text file so it can be viewed on the Arduino IDE or with any text editor application. At the Linux terminal we can use editor nano.
[深圳-首页]